To upload your content to Sinespace you first need to have a Creator account.
To get the Creator account, go to https://sine.space/creator and click on Signup as a creator. When you signup as a Creator, you will need to provide your real name, address and email address to receive cashouts (the amount owed to you for items purchased by users).


Sinespace is using Unity as its engine, so to upload items, you will first need to install Unity. We list the most recent and recommended versions of Unity on our Wiki. To download a version of Unity which is not the most recent on their website, go to their Archive page and download the version which is listed on our wiki.
When Unity is fully installed, you can then download our SDK/Editor Pack. See the full guide to downloading and installing Unity here.


Our SDK contains hundreds of ready-made components to help you upload content to Sinespace. You will need this installed on Unity before you can upload an item.
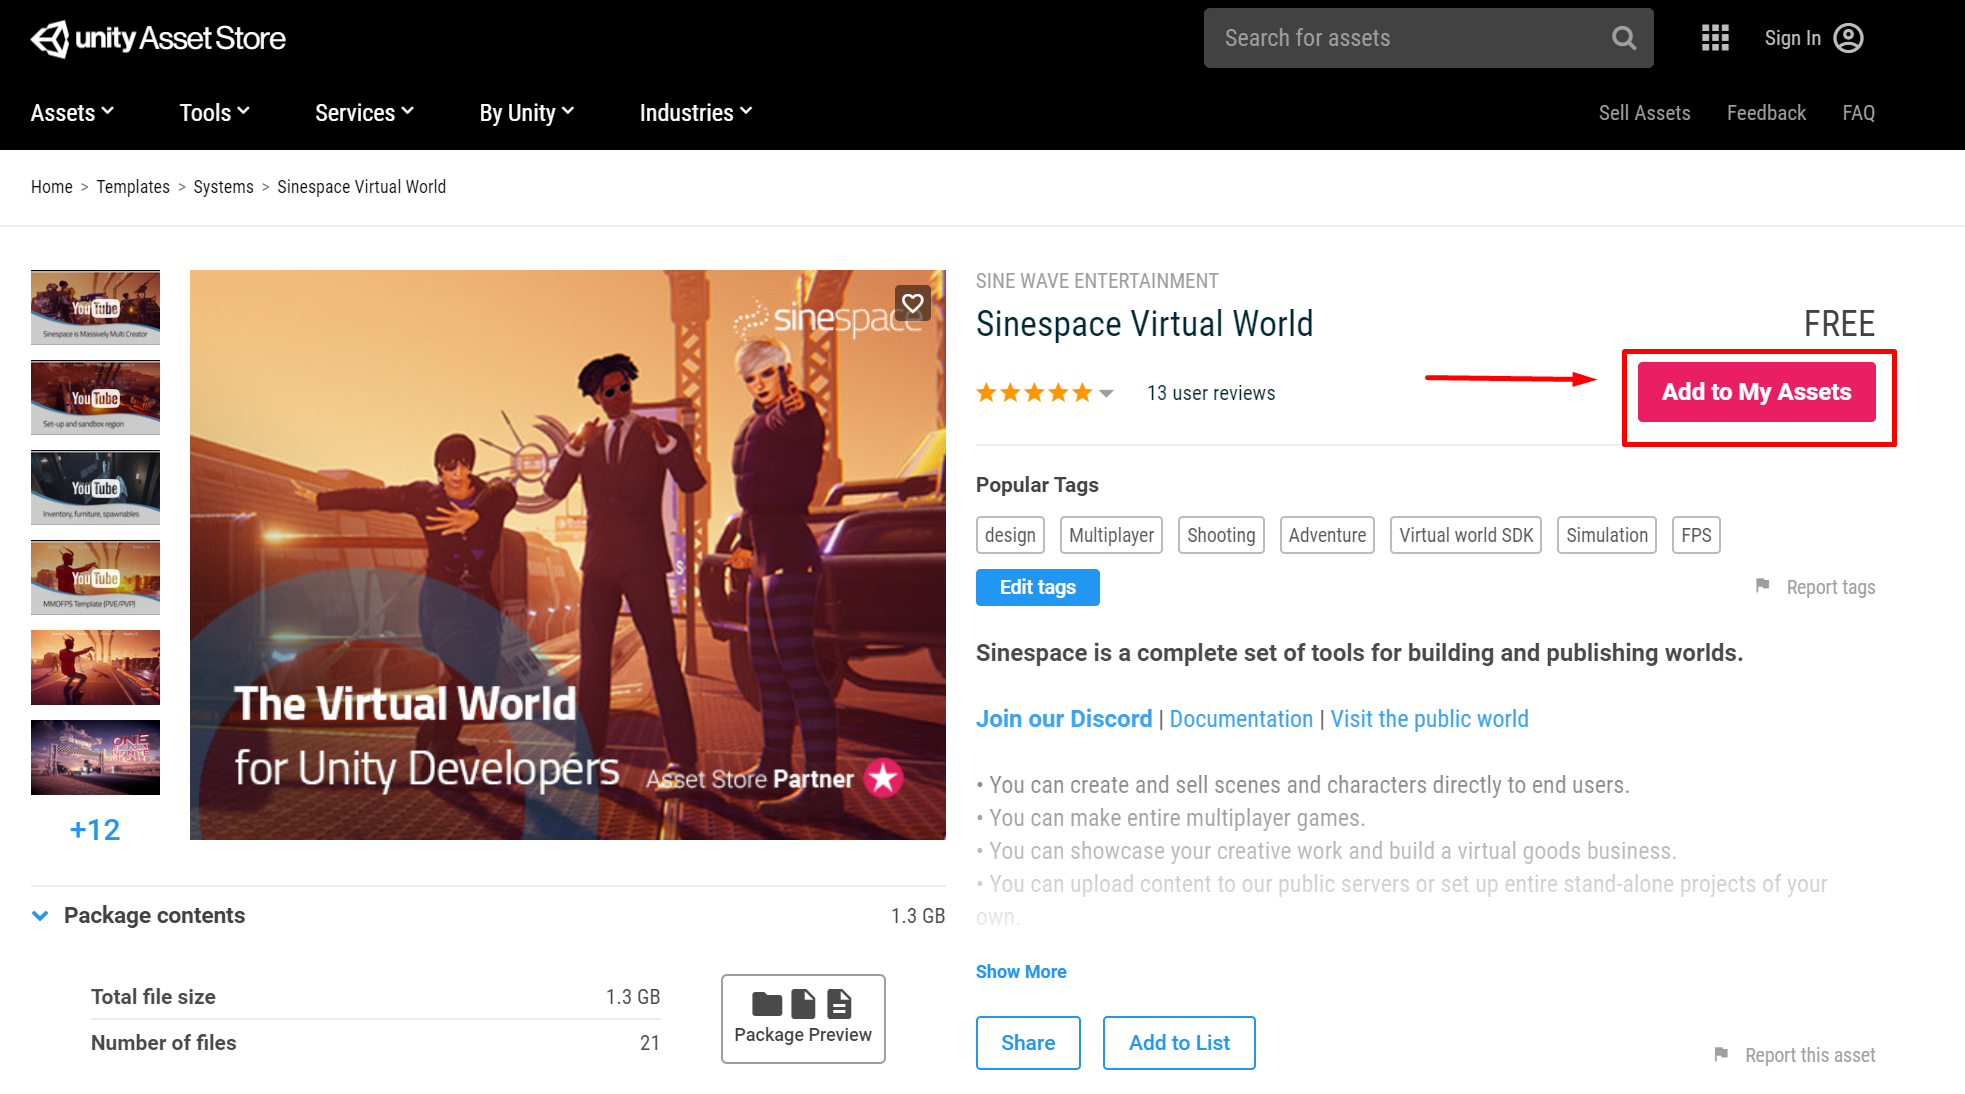
You can download the SDK from the Unity Asset Store here. You will need to sign into your Unity account before you can download the SDK. You can see a full guide on how to download and install the SDK on our wiki.
You can upload your existing 3D models or completely new ones. The items you can upload to Sinespace are:

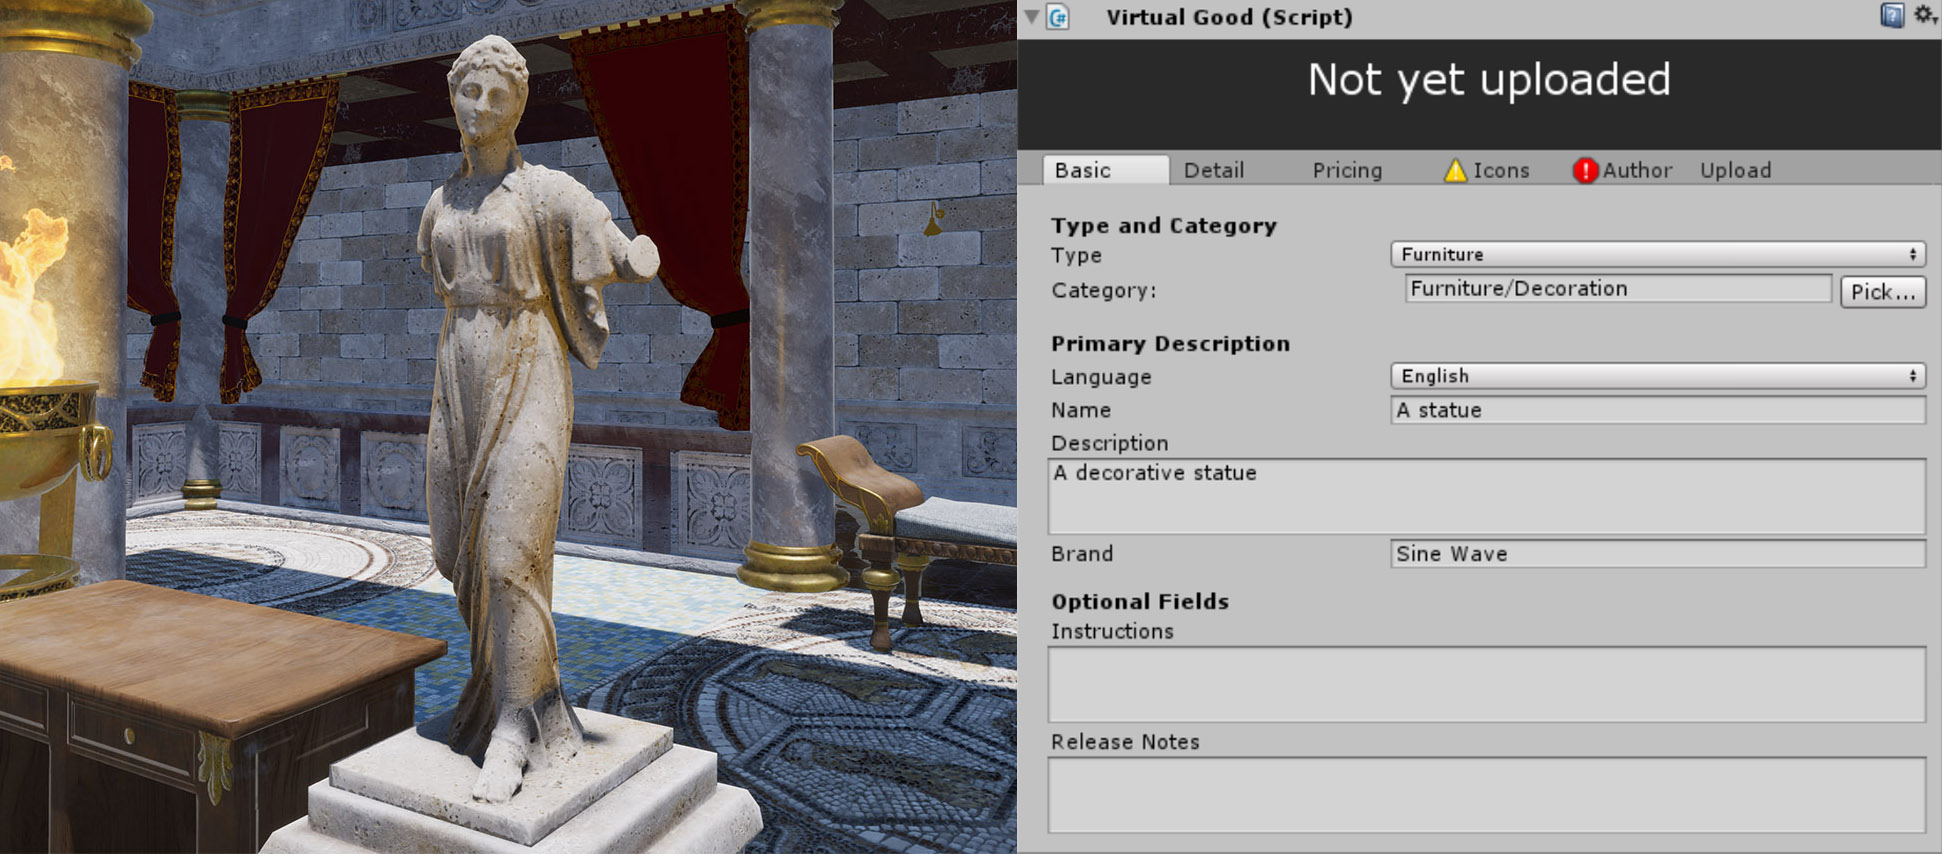
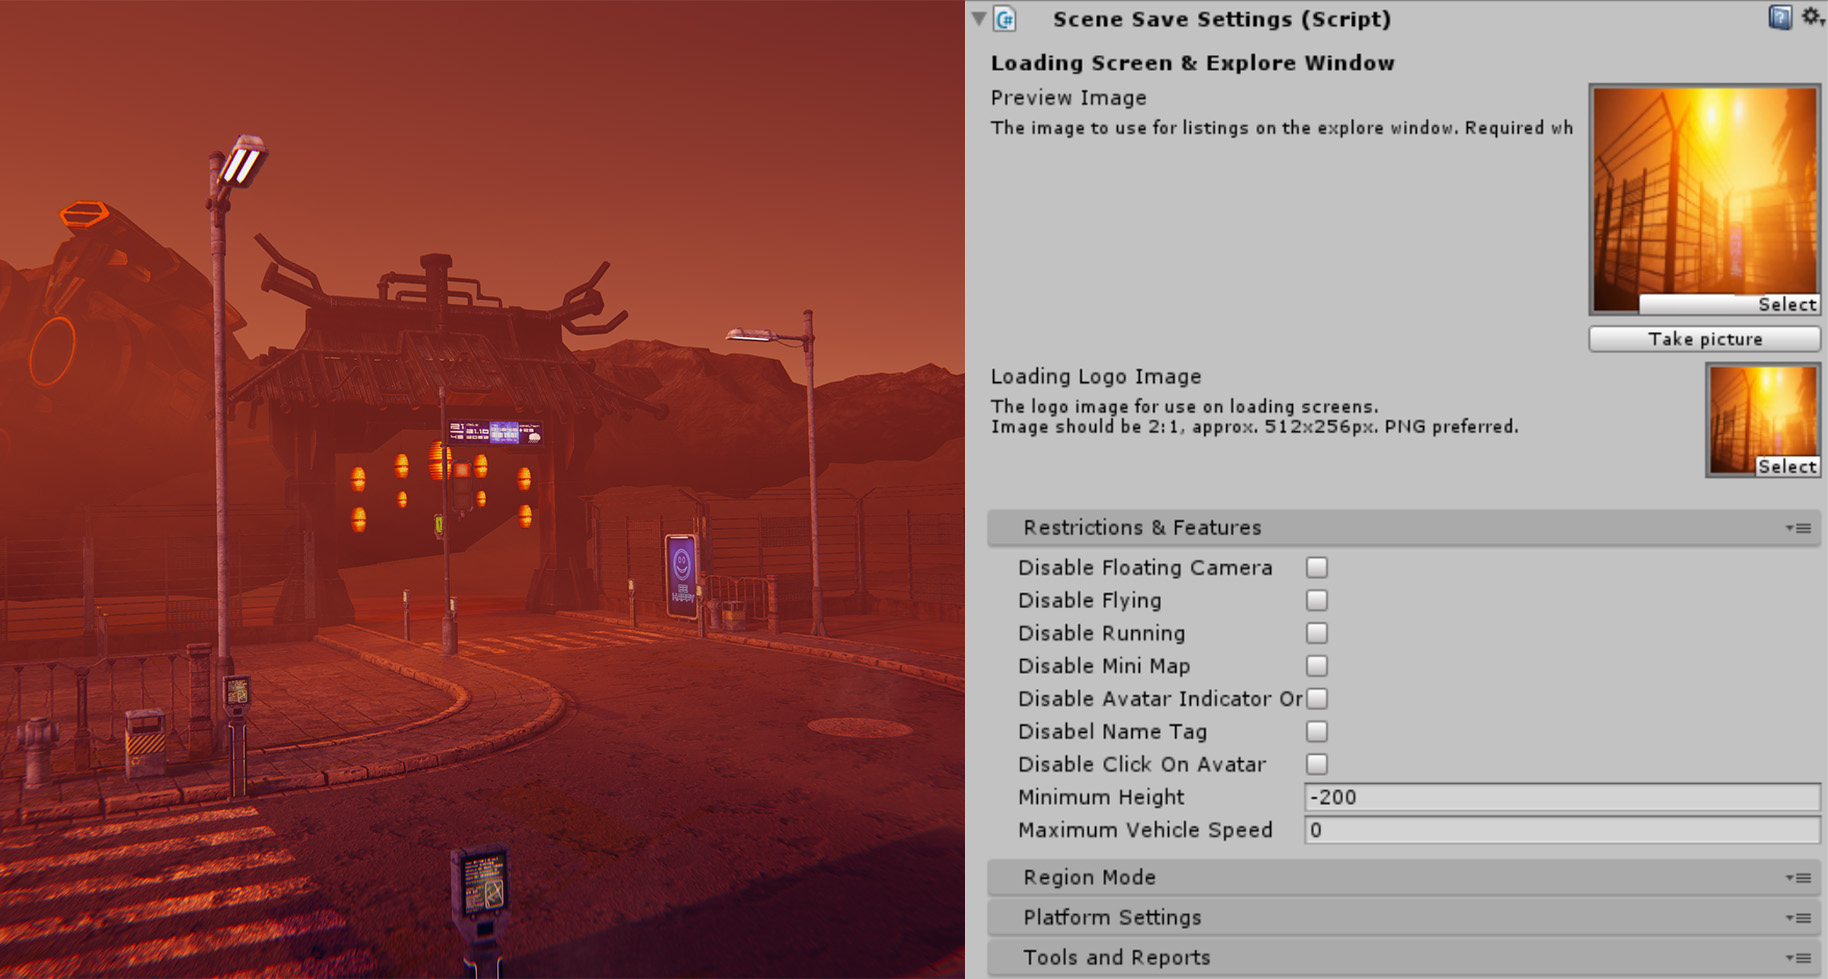
To upload items, you will need to add the Virtual Good component to them to sell them in-world. If you are uploading a region, you will need to add the Scene Settings to it to upload. Home templates need the Room Floor component to make them an editable home region. We have comprehensive tutorials for uploading different items on our wiki. You can find a tutorial for how to upload items via the Virtual Good component here
When you have submitted your content through the Virtual Good component, it will start the upload process to the Sinespace servers. You can check the progress of the upload on Curator. You can connect with other creators and our staff on Discord if you need any help or just want to show your WIPs. Please see our Terms of Service for more details on what you can/cannot upload.

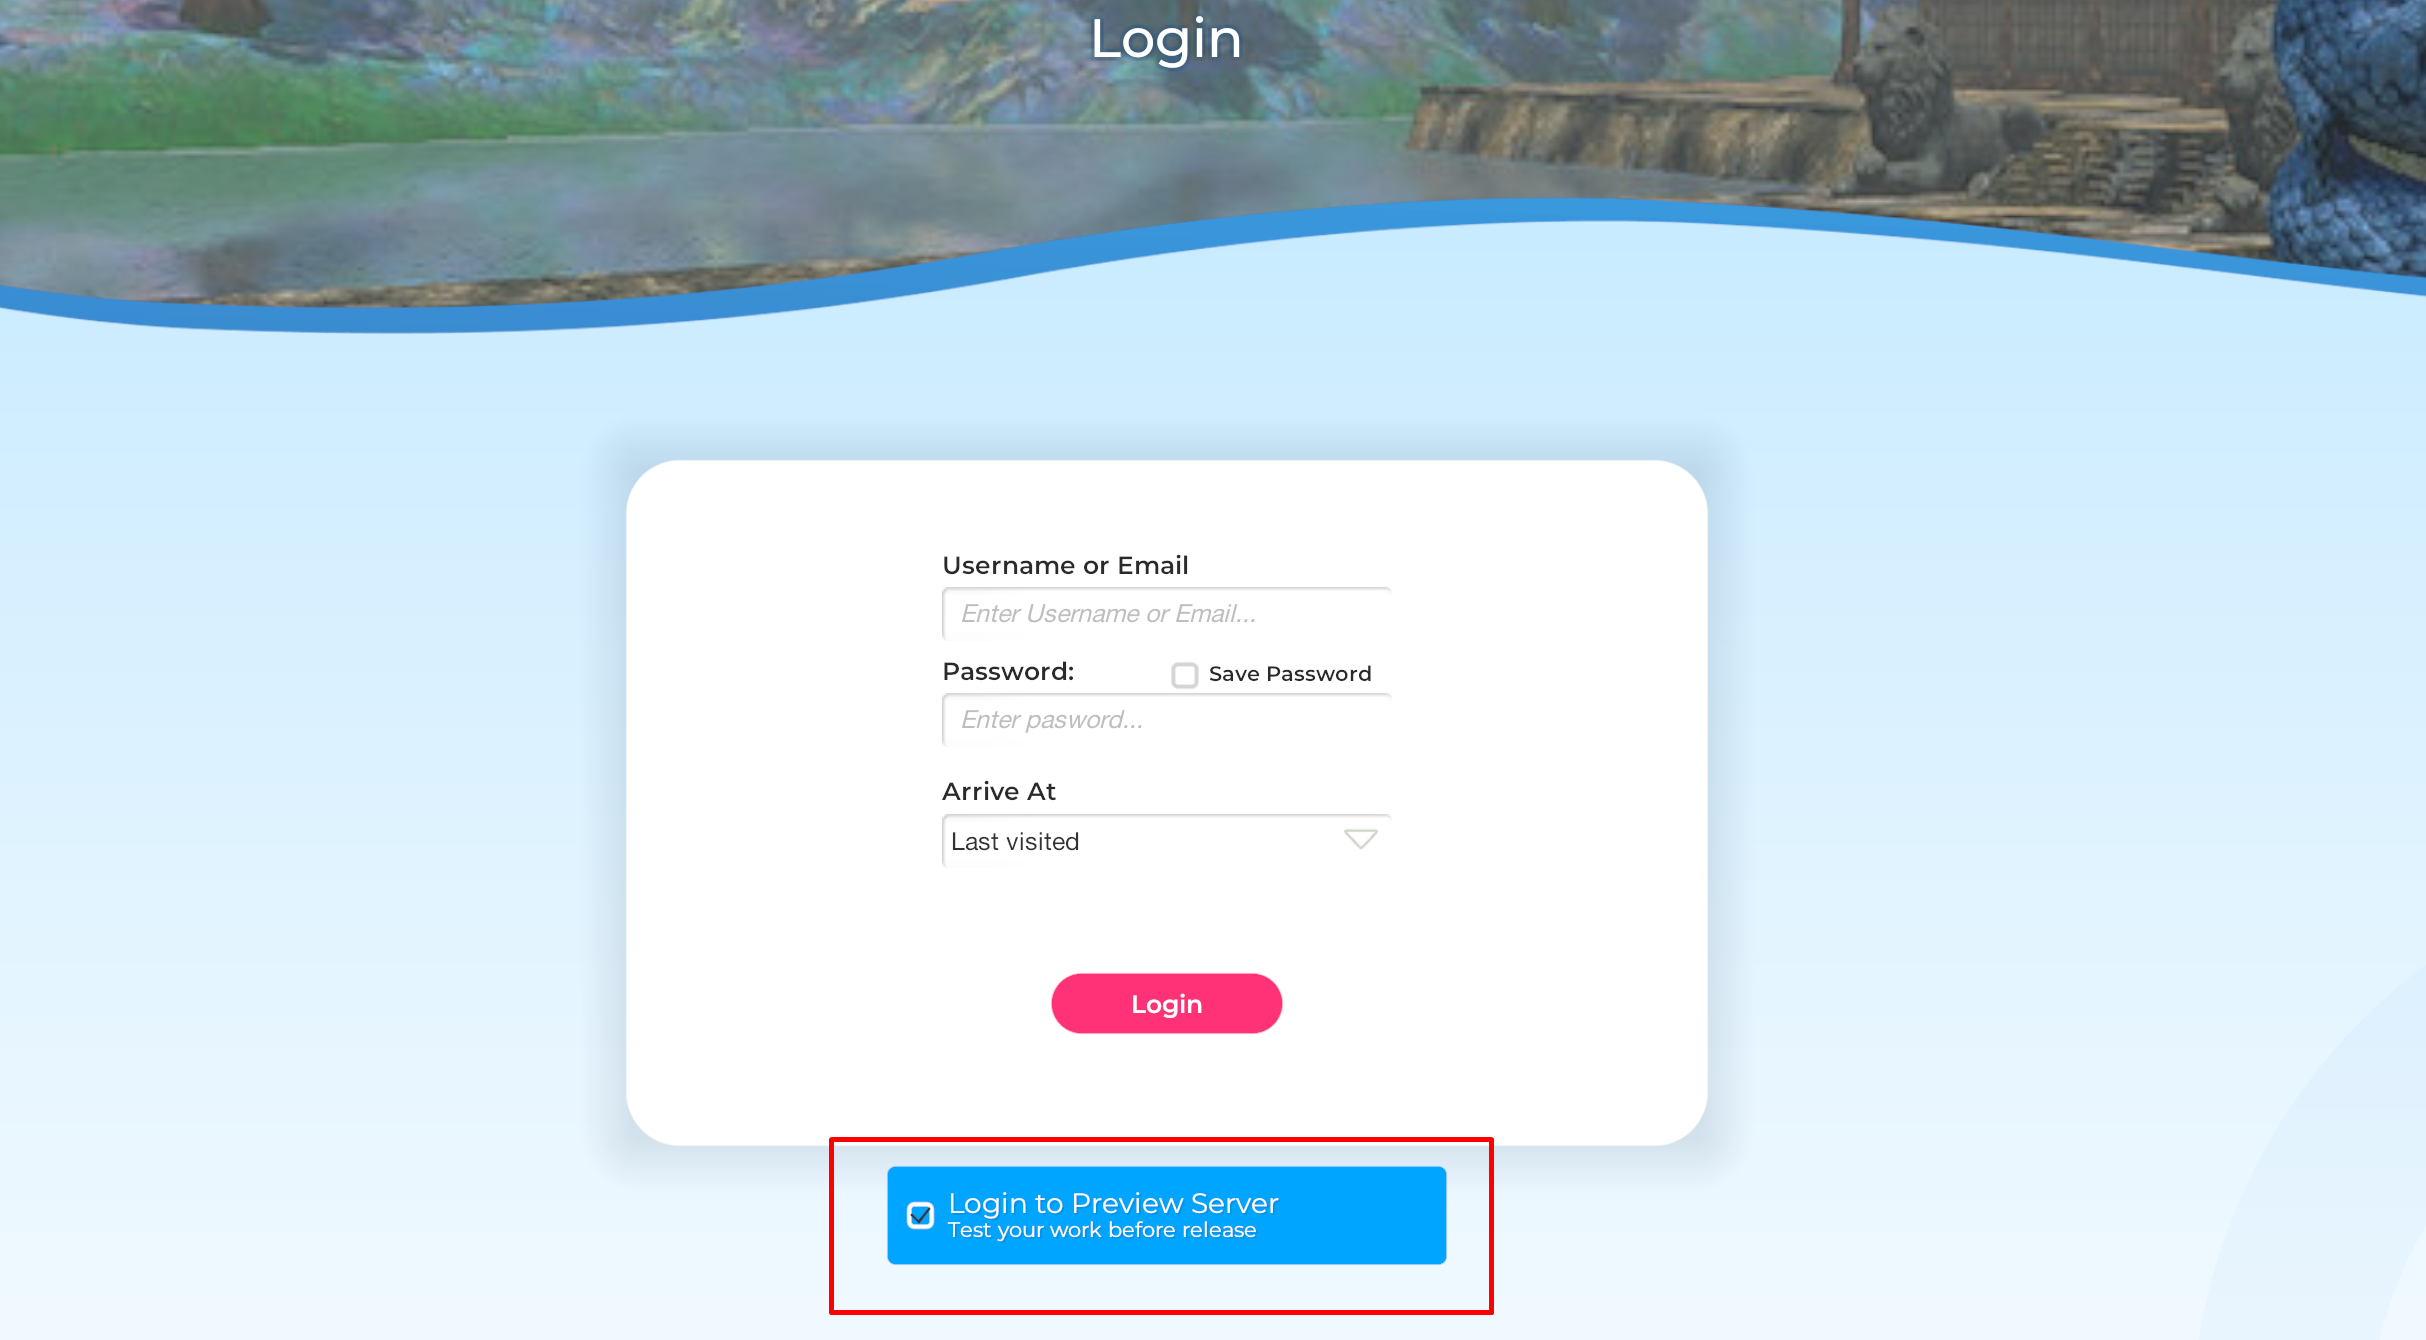
Once the upload is complete, you can preview your content on the preview server before submitting it for the review team's approval. To view your content in-world, launch your Sinespace viewer and then tick the 'Login to Preview Server' option on the login screen. You will find the item you have uploaded available in your inventory.
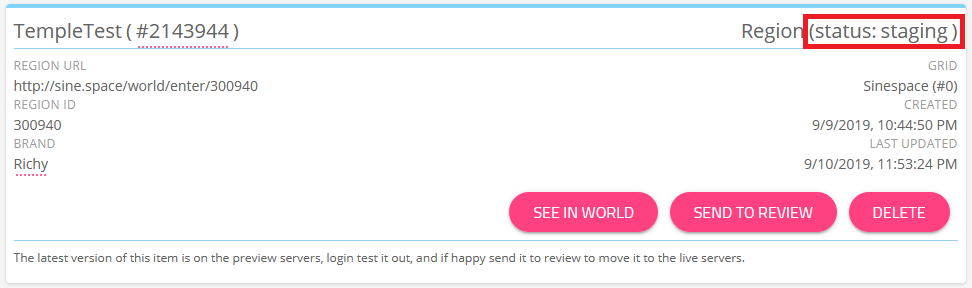
When you are happy with how your content looks in-world on the preview server, you can then go ahead and send your content for review by our review team.
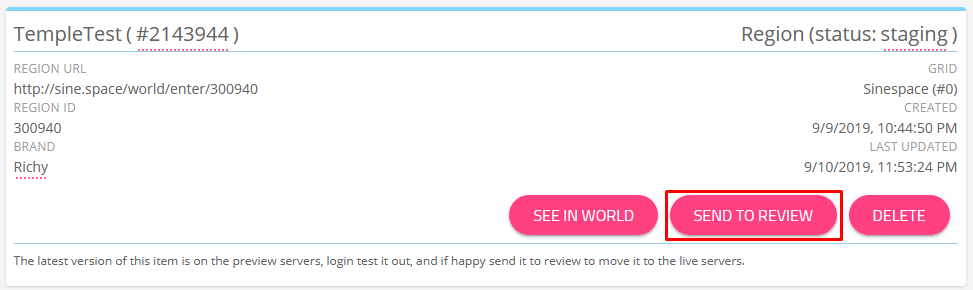
To send it to review, you will need to log into Curator. Once you are logged in, find the item you want to push to the review team, and click the Send to Review button. Our review team will check the content and either push it to live or reject it depending on whether there are any problems with it.
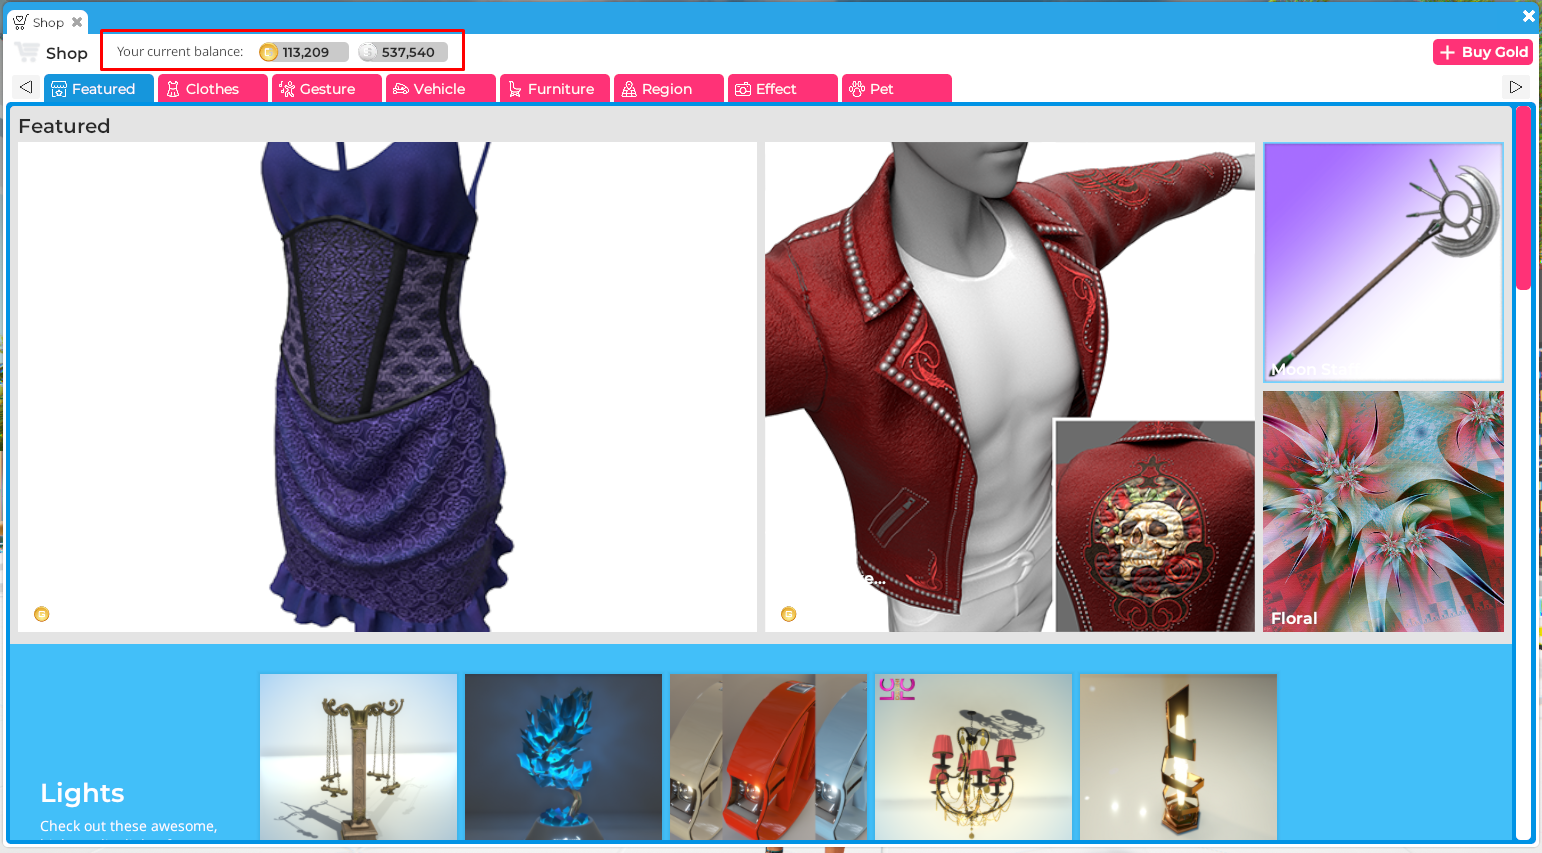
There are two types of currency in Sinespace: Silver and Gold. Silver is the promotional currency, which you can earn by selling items for Silver, participating in event contests, or by staying in-world for a certain amount of time.
Gold is purchased with USD (US dollars). You can earn Gold by selling items in the Shop for Gold. If you want an item sold only for Gold and not for Silver, set the selling price on the virtual component in Unity to -1 for Silver.